Beam Compasses; Large & Accurate Circles

Left, Keuffel & Esser 12 inch to 36 inch. Right: ECOBRA 4 and 12 inch, next Keuffel & Esser 7 inch and extensions, Keuffel & Esser 10 inch.
People think of beam compasses- if they think of them at all- for large circles. That is half of the story. The beam compass design is the most accurate of the compass designs. It has always been used where very good accuracy is required. Watch makers used beam design compasses down to as small as a few millimeters in radius. They were used into the 1980s for radii as large as a few meters for laying out accurate large circles. For drawing purposes we are mostly concerned with circles of between 100 mm and 1 meter. The bow compass begins to fail us at less than 100 mm radius and layout circles larger than 1 meter are uncommon unless you are doing mural work. This is one of the few professional drawing instruments which is still made. It’s modern uses are mostly in furniture making and metal work.
This post will cover the best designs, some of which are only available used. I will also mention the two or three models still available.

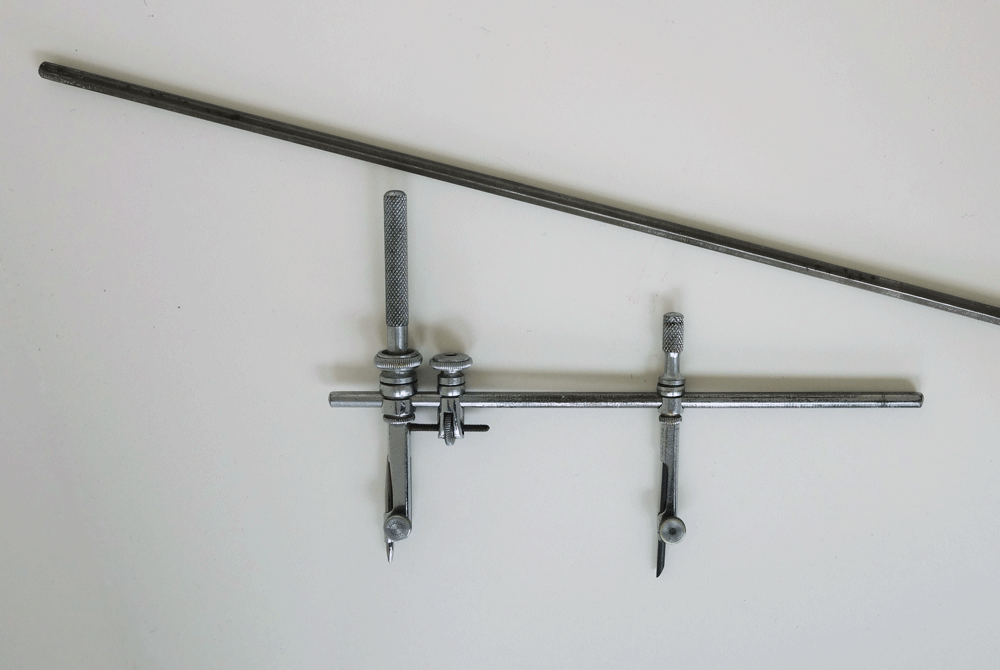
My preferred design for a drawing beam compass is the design above. This design was made by every major manufacturer of drawing instruments for well over a half century. As a result, they are quite common used. This one was made by Gebrüder Haff for Keuffel & Esser. The 4 inch bow compass provides scale. This beam as shown is usable for radii from 50 mm / 2 inches to 180 mm / 7 inches. Adding the extension bar adds another 200 mm / 8 inches for up to 380 mm / 15 inches. I prefer this design for a number of reasons, principally the ease of adjustment. I will go through the method for adjusting to a radius for the three major designs and point out the advantages or problems below. Large beam compasses of 1 meter are also common using this design. Their use is identical.
The second design found most often uses a different mechanism for adjusting the radius. This is one of the designs which is still available from two or three manufacturers. The biggest advantage of this design is that both the adjustable point rider and the fixed point can be removed from the beam. This makes it easy to use beams of different lengths. This model was very often sold with a 100 mm / 4 inch beam, as shown, which is comfortable to use down to about 1 inch radius. The second beam in the set is usually 300 mm / 1 foot. I do not find this advantage important enough to offset some issues with setting the radius on this design, as described below.
When both points can be removed from the beam these are often called a set of trammel points and beam. Technically a “Beam Compass” is a set of “Trammel Points” on a “Beam”.

The third common design and the second design which is still made, is the aluminum compass above. For some reason, this model is almost always aluminum, or properly Duralumin alloy. Their use is very simple. The toothed thumbwheels on the top of the trammels are used to set the points and they are then locked with the set screws on the front. These work, but I find them the most difficult to set accurately. I also find the absence of a finger post at the trammels to be inconvenient. Price seems to be the best recommendation for this model.

The last commonly seen instrument is always referred to as a set of trammel points. These were made by all quality instrument makers and were commonly sold separately from the beams. They are in many senses the best design, probably the most accurate to set, and easiest to use for radii over about 300 mm / 1 foot. These are certainly the prettiest of the designs. They do required finding a beam. That means finding a furniture maker and having one made in mahogany or rosewood. I have seen these with beautiful 3 meter mahogany trussed beams in the auto design shops. I will not comment on these further since they are all slightly different and the method of setting them is usually obvious by inspection.
Setting Beam Compasses to Radius
I have received many questions on setting a beam compass properly and it is one of the biggest differences between the designs so here is a short review. The compass below has screws labeled A, B, and C in order of adjustment. All beam compasses are set by fixing one trammel and adjusting the other. The adjustable point is always adjusted inward. I find this design to be easiest.
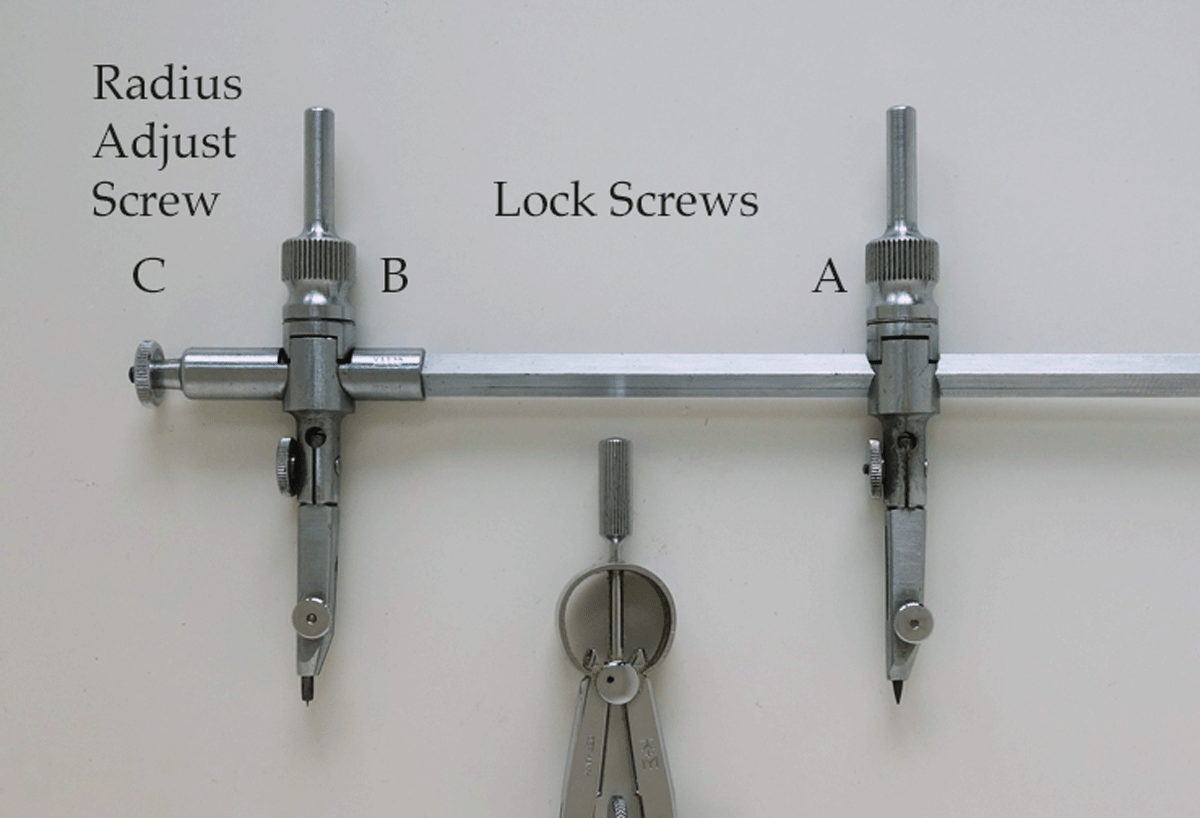
I have this set up as you usually find them, steel point is adjusted. I actually find it easier to control the point while I adjust if I reverse the points so that I am holding the compass at the lead point as I adjust it; I hold the steel point on center with one hand and adjust with the other. Personal choice.
To set a radius, the lock screws [A] and [B] are loosened and [A] is moved out to give a radius slightly larger than desired. The lock screw [A] is tightened. Lock screw [B] is tightened enough that the trammel cannot rock on the beam, reasonably firm. The radius adjustment screw [C] is turned in to give the exact radius and lock screw [B] is set firm. If you use [B] fairly tight when setting, you may not need to do that last extra tightening step.
You are pushing the trammel at [B] while it is fairly snug on the beam. Lubricating helps here. To lubricate this design; tighten [B], screw the radius adjustment screw [C] off completely. Loosen [B] while holding the trammel point. It is under spring tension. It will slide off of the beam and it can be cleaned and lubricated with beeswax or hard paraffin. Lubricate the thread with the same.
(Technical minutiae: You are always adjusting inward to final radius with any compass to take up thread tolerance.)

The second design is not inferior; it is still used in precision tool room measuring equipment. I do find it more difficult to set. To start, [A] and [C] are loosened and [B] is tightened down. The trammel [A] is set to a bit larger than the desired radius and tightened. The same principal is now used here. Lock screw [C] is tightened to give a snug seat of the second trammel on the beam and the radius adjust screw [D] is used to pull the point in to the desired radius. The issue with this design is that [C] often needs to be set up quite tight to prevent the trammel rocking. If there is any rock in the trammel at all, [C] cannot be tightened fully after setting without disturbing the radius. If it is set up tight enough to be accurate it is a bit difficult to use.

The advantage of this design was mentioned above. These can be set up on very short beams which are convenient to use for smaller layouts. This can be quite accurate but is not normally used for pencil work on paper. It would be used for layout on brass work, for example. This small layout was drawn completely with the compass shown. The original divisions of the circle were set up with two steel points, as shown. I will mention the virtues of this under “Dividers”

At the other end of the size scale, a beam compass is ideal for drawing on the easel at A2 size. It is essential for accurate layout of large artwork on this scale.
Beam Compasses Still in Production


The ECOBRA 383XX series / Alvin 961 Compasses
These are still reasonably commonly available. It is not my preferred design but it will work and it will probably be more accurate than a bow compass with an extension bar. I would still check for a used example since these were made in all metal until reasonably recently and they are quite common and inexpensive used.

One of the finest designs is still available at 1 meter from Gebrüder Haff in Germany. These are old stock, they are no longer making them. If you want one, I would buy it now at Haff. The handier 7 inch beam is, sadly, sold out.

Several makers sell versions of the under beam adjustment compass. This model from Veritas / Lee Valley is one of the more “reasonably” priced. Nothing from Veritas is cheap. I bought the earlier model of this compass for woodwork 10 years back and it was a very well made instrument.
Searching will bring up other suppliers. The best professional drawing instruments are no longer made so what you find will be a compromise for drawing use. I would still recommend looking on the used market at this time.